Oracle Linux 8.10 Installation using VirtualBox 7.1
- Ömercan Çalım
- Jul 28, 2025
- 4 min read


In this article we will explain how to install the Oracle Linux 8.10 operating system using VirtualBox.
Prerequisities
Step 1: Fulfilling the Requirements
Let’s download the VirtualBox software and the Oracle Linux 8.10 Full ISO file, then complete the VirtualBox installation. At this point, make sure that the ISO file is downloaded to the same drive as your operating system
Step 2: Virtual Machine Configuration
For more detailed explanations regarding the upcoming pre-installation steps and what follows, you can refer to the Oracle VirtualBox 7.1 documentation.
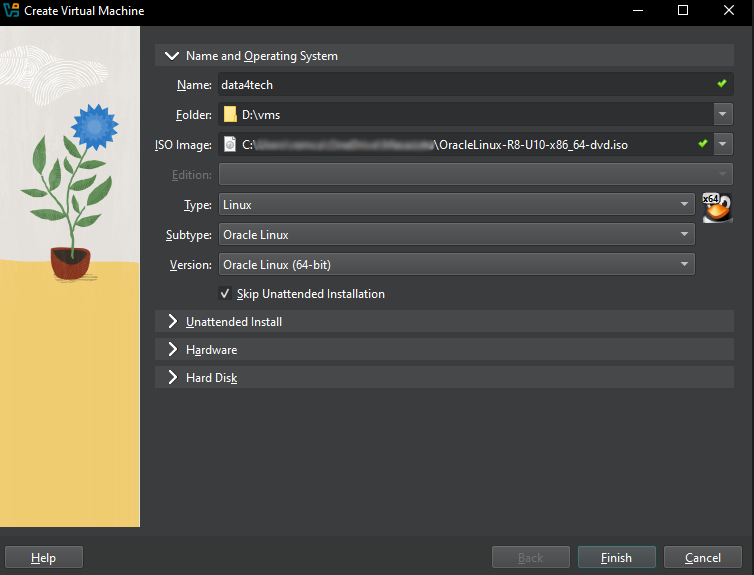
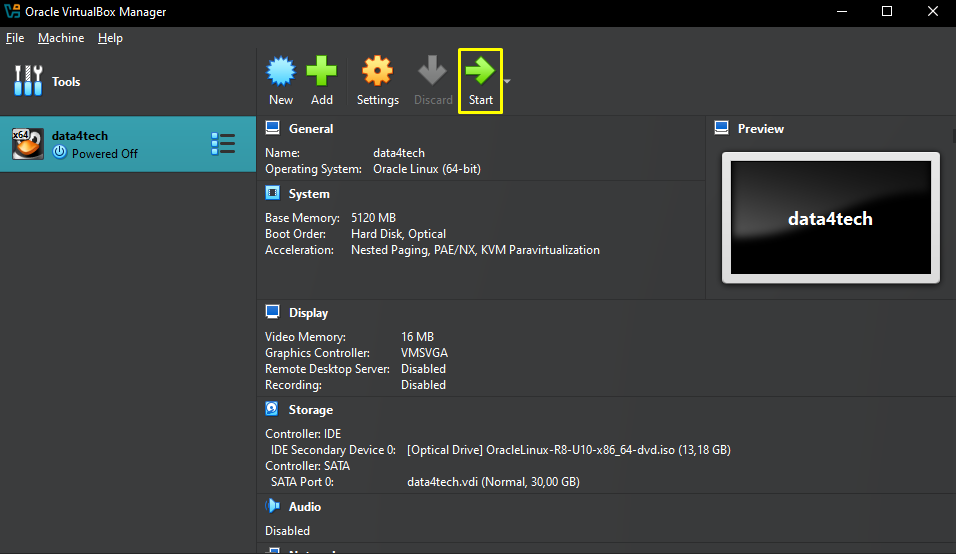
Let’s open VirtualBox and click the New button to add a new virtual machine.

If we have an external disk, let’s create a folder named "vms" on that disk, this folder will be the storage location for our virtual machines.
Name: Name of virtual machine.
Folder: Path of the folder where virtual machines are stored.
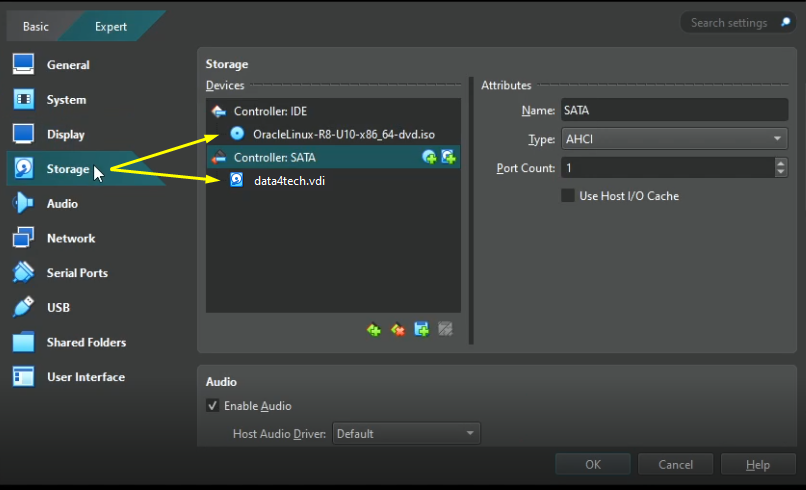
ISO Image: Downloaded ISO file.
Check the Skip Unattended Installation checkbox.
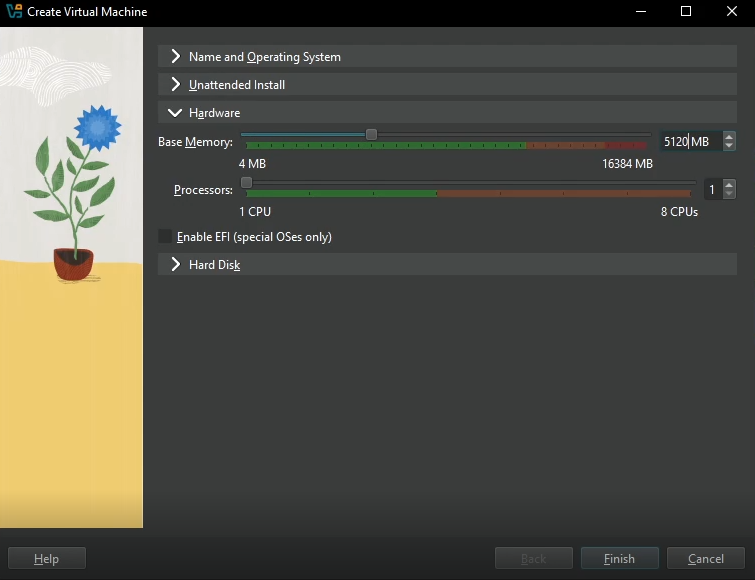
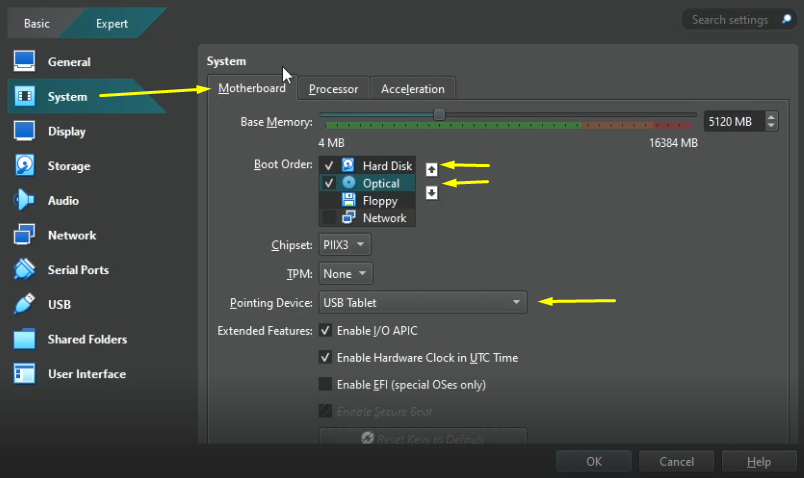
Allocate 5GB (5120 MB) of RAM as the Base Memory. This parameter represents the amount of RAM that the virtual machine will have.
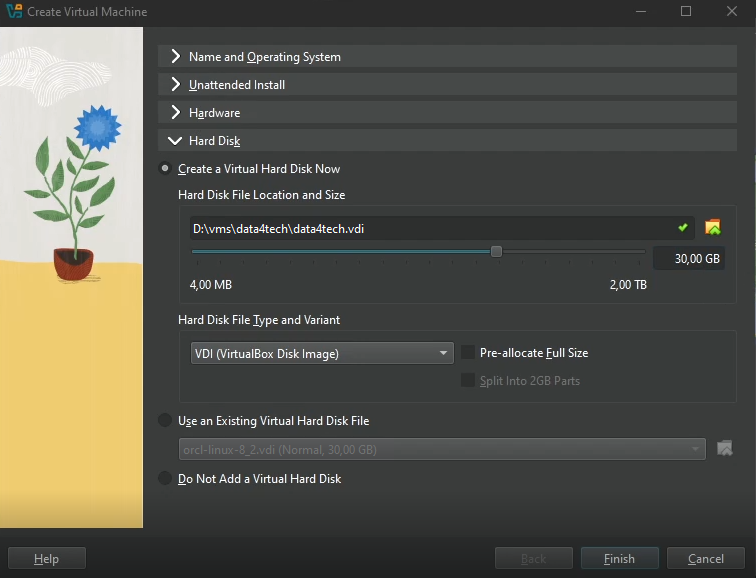
Allocate 30 GB of space for the Hard Disk File Location and Size parameter.
Finish.
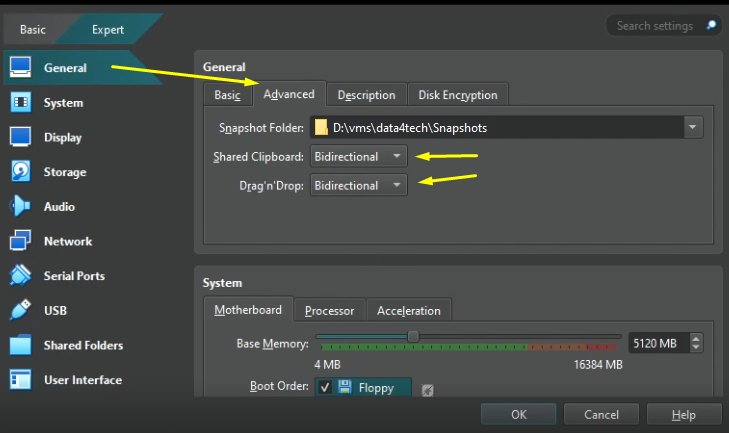
Settings.


Select Expert.
Shared Clipboard ve Drag'n'Drop: Bidirectional. We can perform copy/paste or file transfer between host machine and the virtual machine.
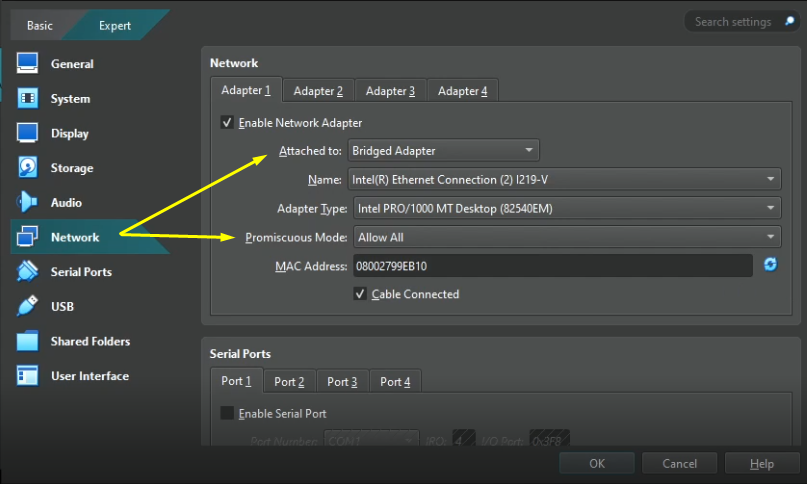
Network:
Attached to: Bridge Adapter. Virtual machine will be able to act like a real server on the LAN, communicate with the host machine and also access the internet through it.


Step 3: Operating System Installation
Close the notification window and press "Enter" to skip Automatic Boot.

Although you can skip the system check by pressing the Esc key, it is recommended to wait.

Click the Continue button.


Time & Date
Change the region and city values to set the time for your desired location.

Installation Source

Software Selection

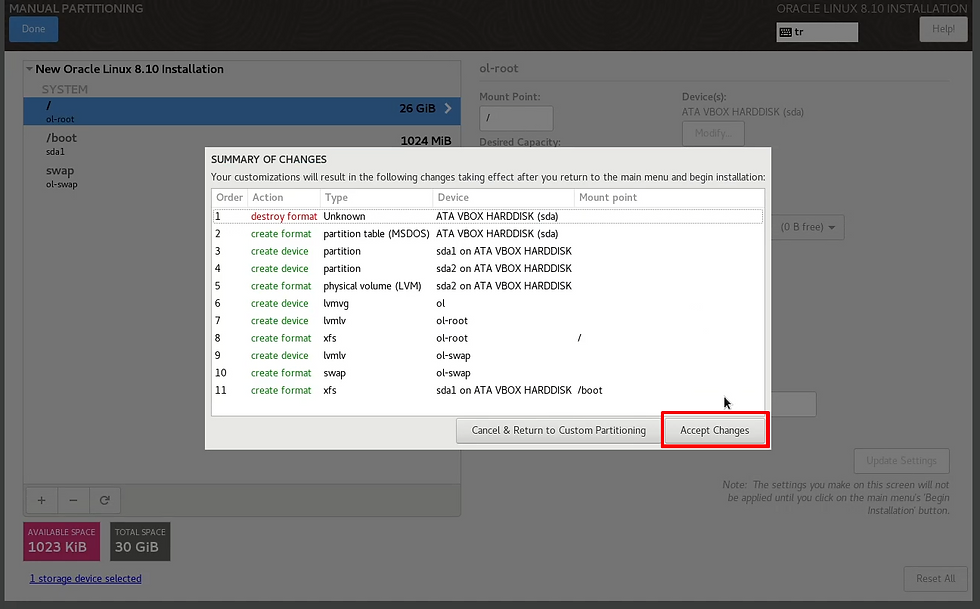
Installation Destionation


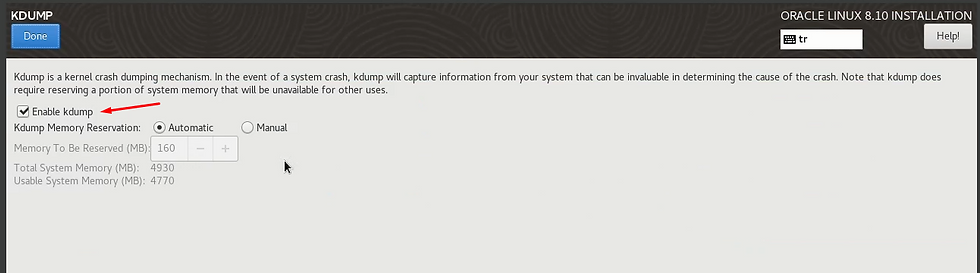
KDUMP
Network & Host Name
Name your server.
Click Apply button.
Confirm the change.
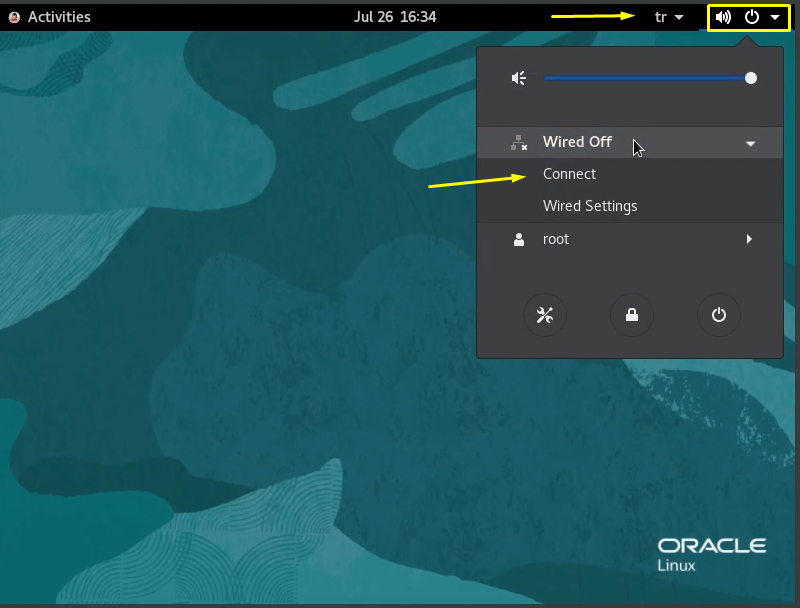
Configure network settings. Details below.
Turn on Ethernet.

On your main computer, run Command Prompt by typing "cmd" into the search bar then run the "ipconfig" command.

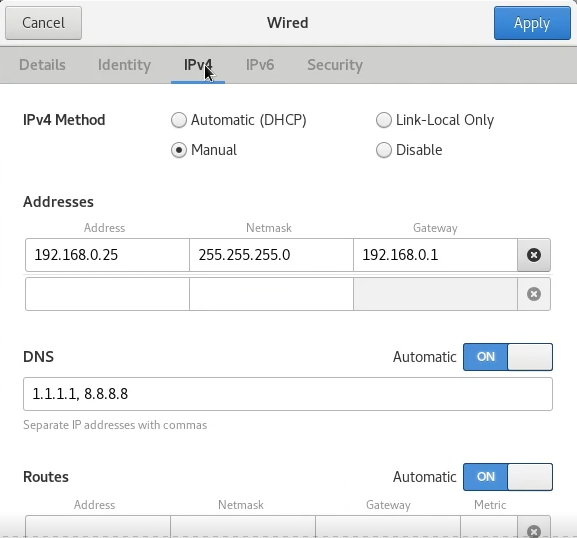
Configure your virtual machine IPv4 settings based on the information we obtained in the previous step.
In Step 2, Bridge Adapter was selected as the Network Adapter and its functions were discussed. At this point, to avoid an IP conflict, ensure that your virtual machine’s IP address is different from that of your host machine.
In addition, devices connected via Wi-Fi are typically assigned an IP address automatically by DHCP, so the IP address may change. If you want to set a static IP address for your virtual machine, it may be beneficial to assign a static IP to your host machine as well.
As an example:
If your host machine’s static IP address is: 192.168.x.y
Then you can set your virtual machine’s static IP address to: 192.168.x.(y+1)
Since they are on the same local network (LAN), the Netmask and Gateway settings should match those of your host machine.
In the DNS servers field, enter: "1.1.1.1, 8.8.8.8".

Create User
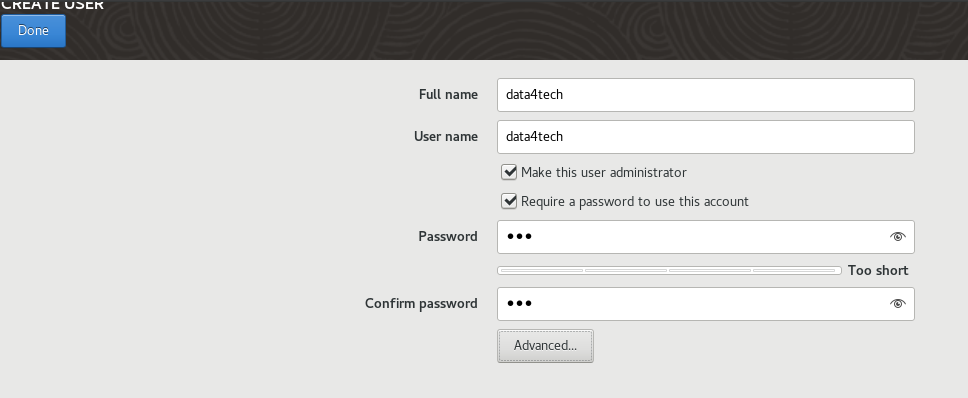
Finally, from the Root Password section, set a password for the root user who is our most privileged user and click the Begin Installation button.


Step 4: Virtual Machine Settings
Login as root user by clicking Not listed? option.


Upon successful login, wait for the welcome screen to appear then proceed by clicking the Next button.

Check your keyboard and connection settings. Change keyboard language if you assigned another language. Open the connection settings from the Wired Settings section.

Verify the informations.
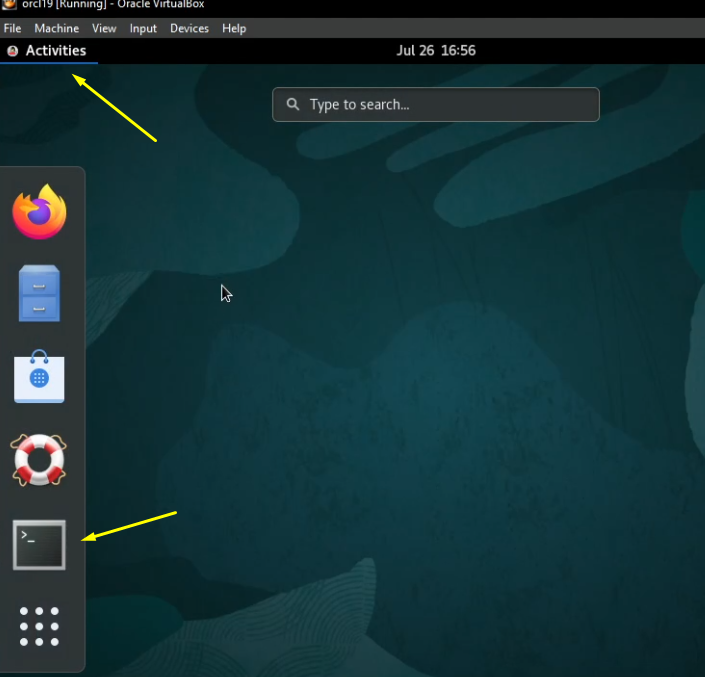
Open a terminal to run commands for testing the connection.
Test the internet connection by running the command below. If the connection is working properly, the terminal will display results every second.
ping www.google.com
Open new tab.

Run the below commands.
# hostname                - Displays the name of the current system (host)
# cat /etc/hosts          - Displays the contents of the hosts file
Switch other tab and run the below commands.
# vim /etc/hosts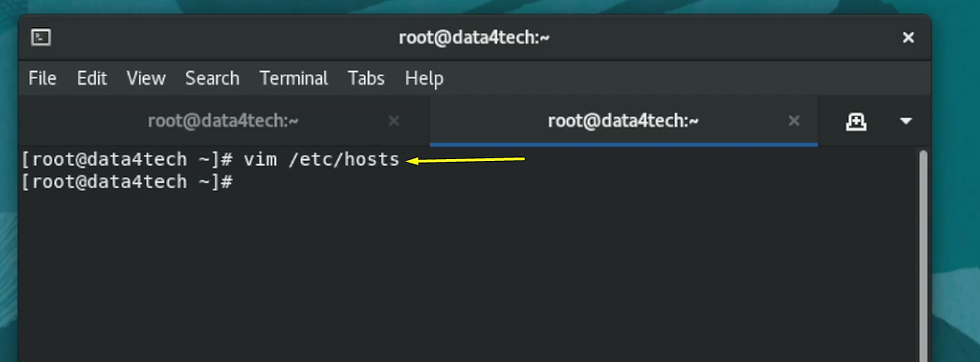
Vim is a text editor used on Linux/Unix systems. It runs in the terminal and is commonly used for tasks such as writing code and editing configuration files.
Vim operates in 3 main modes:
Normal Mode (default startup mode)
Insert Mode (used for writing text)
Command Mode (used for saving, exiting, etc.)
Navigation and editing:
Cursor Movement:
You can move the cursor using the arrow keys or the h, j, k, l keys:
Writing Text:
i → enters Insert Mode (inserts text to the left of the cursor)
a → enters Insert Mode (inserts text to the right of the cursor)
Switching to Command Mode:
Esc → returns to Normal Mode
Save and Exit Commands:
To use the following commands, first return to normal mode.
:w → save
:q → quit
:wq → save and quit
:q! → quit without saving
Now that we have a basic understanding of how to use Vim, let's edit the "hosts" file.
Move to a new line and enter the IP address, server name, and alias for your server.
MAKE SURE TO ENTER THE CORRECT INFORMATION FOR THE SERVER YOU CREATED!
Press the Esc to return to Normal Mode then run the following command to save the changes:
:wqNext, run the following command again to verify the changes you made to the "hosts" file:
# cat /etc/hosts
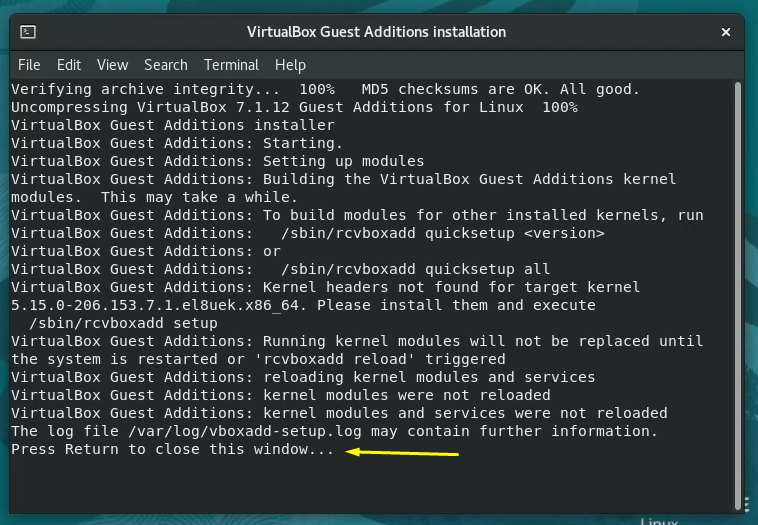
Although attempts are made to resize the virtual machine window, the screen size of the device remains the same. To resolve the screen size issue and enable bidirectional copy/paste and file transfer between the two devices, follow the steps below.


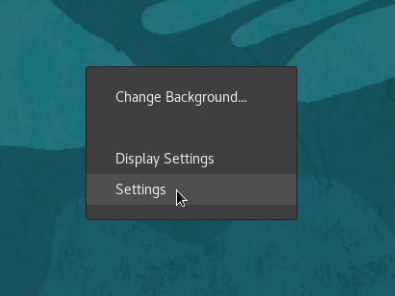
Finally, right click on any area of the desktop, go to settings and disable features such as sleep mode and screen lock.

Privacy, Screen lock, Automatic screen lock --> OFF
Power, blank screen --> never
Reboot the system.
To advance your understanding, the following Oracle documents can be consulted. Have a nice day.


Comments